Showing posts with label Candies. Show all posts

12.26.2008

Where I've been

The past 4 weeks of my life been a blur of projects, papers, finals (all leading up to a 4.0!), and all of this......


I know the pictures aren't that pretty, but I took them at work.

The plates included....

Cookies
Chocolate Chipperdoodles
Thick and Chewy Chocolate Chip
Chocolate Chunk Cookies
Chocolate Gingerbread
Gingersnap
Gooey Butter
Snickerdoodles
Sugar Cutout

Candies
Chocolate Walnut and Triple Chocolate Toffee
Peppermint Bark
PB Fudge


I'm looking forward to easing up on the baking a bit, doing a little cooking, and relaxing the next 3 weeks before school starts again. I know my husband is thrilled to have the deep freeze back now that 35 dozen cookies are no longer taking up all the room!

Peppermint Bark

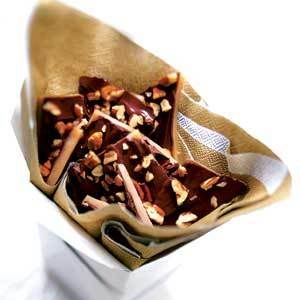
Not the best picture, but peppermint bark is always tasty!

Peppermint Bark
source: JoyofBaking.com


6 ounces semi sweet chocolate, coarsely chopped
2 teaspoons vegetable oil
6 ounces white chocolate, coarsely chopped
1/3 - 1/2 cup crushed candy canes


Line the bottom and sides of a 9 inch (23 cm) square baking pan with aluminum foil, smoothing out any wrinkles.

Melt the semi sweet chocolate and 1 teaspoon of vegetable oil in a heatproof bowl over a saucepan of simmering water. Immediately pour the melted chocolate into the prepared pan and tilt the pan so the chocolate makes an even layer. Place in the refrigerator for about 30 minutes, or until the chocolate has set.

Then, melt the white chocolate and remaining 1 teaspoon of vegetable oil in a heatproof bowl over a saucepan of simmering water. Immediately pour the melted white chocolate over the dark chocolate and tilt the pan so the chocolate is in an even layer. Sprinkle the crushed candy canes evenly over the white chocolate. Place in the refrigerator for about 30 minutes, or until the chocolate has set.

Remove the Peppermint Bark from the pan by lifting the edges of the aluminum foil. Peel back the foil and break the bark into small irregular pieces. Store in an airtight container in the refrigerator for up to two weeks.
Makes about 25 pieces.

Saltine Toffee

I first had this tasty treat two years ago, but this is the first time I made it myself. This recipe is perfect for me because past candy attempts have always turned out awful. One of the pans of toffee I made was semisweet with walnuts on top and the other was milk chocolate with dark and white chocolate drizzled on top. This toffee is always a crowd pleaser.

Saltine Toffee Candy


1 C Butter
1 C Brown Sugar
1.5 C chocolate chips
1 Sleeve (about 40) Saltine Crackers
1 C chopped nuts
Non-Stick Cooking Spray

Line jelly roll pan with foil and spray with non-stick spray. Lay crackers out flat on foil. Melt sugar and butter until foamy (3 minutes). Pour over crackers and spread to coat. Bake 10 minutes in 350ยบ oven. Remove from oven. While hot, sprinkle with chocolate chips, let soften and melt, then spread. Sprinkle with nuts. Let cool. Refrigerate until hardened. Break into pieces like peanut brittle.

12.13.2007

What it should have looked like....

I was on msn earlier and found a bunch of holiday candy recipes. Two of them were from a cookbook I own and have tried to make before.....

This Toffee, should have looked like this:


This Candy, should have looked like this:


Sad how it doesn't quite turn out that way.

8.13.2007

A Delicious Disaster

Friday night M went to a Wii Party (I guess boys never grow up....) so I had the entire evening to myself! I was so excited. I used the evening to cook and bake. We had to go to a BBQ at my brother in law's on Saturday so I decided to bring my Taco Salad and make Easy Candy-Bar Teats. The recipe seemed simple enough and I had all night.

I got everything prepared and realized that I didn't have the correct size pan. I mean come on, who has a 9x9x2 inch or 11x7x1.5 inch pan. Not me said the flea. I'm not sure what size pan I used (it was smaller than the recipe called for) but, I think it was the demise of my treats.

Easy Candy-Bar Treats
Prep: 10min Cook: 7 and 3/4ths minutes Chill: 2 hours


½ cup butter
1/3 cup unsweetened cocoa powder
¼ cup packed brown sugar
¼ cup cold milk
3.5 cups sifted powdered sugar
1 tsp vanilla
30 vanilla caramels, unwrapped*
1-tablespoon water
2 cups unsalted peanuts*
½ cup semisweet chocolate chips*

½ cup milk chocolate chips*

1) Line a 9x9x2 inch or 11x7x1.5 inch-baking pan with foil, extending the foil over the edges of the pan. Butter the foil; set aside.

2) In a large microwave-safe bowl, microwave the butter, uncovered on 100 percent power for 1 – 1.5 minutes or until melted. Stir in cocoa powder, brown sugar, and milk. Microwave, uncovered on high for 1 to 2 minutes or until mixture comes to a boil, stirring once. Stir again; microwave for 30 seconds more. Stir in powdered sugar and vanilla until smooth. Spread mixture in prepared pan.

3) In a medium microwave-safe bowl, combine caramels and water. Microwave, uncovered, on 50 percent power (medium) for 2.5 to 3 minutes or until caramels are melted, stirring once. Stir in peanuts. Microwave, uncovered on medium for 45 to 60 seconds more or until mixture is softened. Gently and quickly spread peanut mixture over fudge layer in pan.

4) In a 2-cup microwave-safe glass measure, combine semisweet and milk chocolate pieces. Microwave, uncovered, on 50 percent power for 2-3 minutes or until melted, stirring once or twice. Spread over peanut layer, Score into pieces while warm. Cover and chill for 2 – 3 hours or until bottom is firm. Use foil to lift candy out of pan. Cut into pieces. Store tightly covered in the refrigerator for up to 3 weeks.

**I used 3 cups peanuts, 43 caramels, 1.25 cups milk chocolate chips, and 1.25 cups semi sweet chocolate chips**


So everything sounds simple enough, right? My picture up above looks decent, right? So here is....

The Story of A Delicious Disaster

It all started with the fact my pan wasn't the right size. I'm pretty sure it was too deep. I made my bottom later and all was good. I started on my peanut layer and all was good until I went to spread it in the pan. There wasn't enough mixture! I melted a little more caramel and add some peanuts and all was good. Before I mixed my chocolate chips I added about 1/4 cup more of each kind of chocolate chip since I had to add more peanut mixture.

So I made the candy and stuck it in the fridge. I let it sit there all night, thinking that it would be firm in the morning. When I finally pulled the dish out, I lifted the candy out of the foil and this is what I see......


The damn fudge didn't set! So I was a little upset about it and I decided to put it back in the dish (without the foil). I had M cut it for me. As soon as he stuck the knife in there and fudge part started gushing up the sides. :( He cut it anyway and we stuck it in the freezer. It tasted delicious, it was just super messy since the fudge layer didn't set. Here is a good shot of all 3 layers and you can see the fudge layer oozing around the bottom.

Here is a shot after about 1/2 the candy was devoured. You had to scape up the fudge layer. Not that that was a bad thing, it just wasn't what I expected. I'm pretty sure, the bottom layer was too thick to set. It may not have boiled enough either.


So all in all, it didn't turn out like I thought it would, but it was still good. It tastes very similar to a snickers bar. I will definitely be trying this again.... next time I'll use the correct pan!

8.07.2007

New Heights In My Tiny Kitchen

Last night I did something for the first time ever.... I made candy! I was really proud of myself because this is something I had to keep an eye on. If the mixture got too hot, I was screwed, if it wasn't hot enough I was screwed. Who knew there was a such thing as thread stage, soft-ball stage, firm-ball stage, hard-ball stage, soft-crack stage, and hard-crack stage. My recipe dealt with the soft-crack stage. Anyway, this was really good, really, really good. I've decided that in the future I'll only make it when I have to bring a dish somewhere because M and I don't need to be eating all that sugar, butter, and chocolate!


Toffee Butter Crunch
Prep: 15 min Cook: 20 min Chill: 20 min Makes: 48 servings …. HA!


1 cup butter
1 cup sugar
3 tablespoon water
1 tablespoon light colored corn syrup
1 cup semisweet chocolate pieces
½ cup finely chopped pecans or almonds, toasted


1.Line a 15x10x1 inch-baking pan with foil extending foil over edges of pan. Set pan aside.

2. Butter the sides of a 2-quart heavy sauce pan. In saucepan melt butter; add sugar, water, and corn syrup. Cook and stir over medium – high heat until mixture boils. Clip a candy thermometer to side of pan. Reduce heat to medium; continue to boil at a moderate steady rate, stirring frequently until thermometer registers 290 soft crack stage about 15 minutes (adjust heat as necessary to maintain a steady boil) watch carefully after 280 to prevent scorching. Remove saucepan from heat; remove thermometer. Pour candy into the prepared pan, spreading quickly.


3. Let candy stand about 2 minutes or until set; sprinkle with chocolate pieces. Let stand 1 to 2 minutes or until set; sprinkle with chocolate pieces. Let stand 1 or 2 minutes. When chocolate has softened, spread over candy. Sprinkle with nuts. Chill about 20 min or until firm.


Random Thoughts:

*I was frazzled when I started making this and got out the cooking oil rather than the corn syrup. I was thisclose to pouring it in the mixture. Thank goodness I caught myself. I also forgot to toast my almonds.

*I don't see how Ms. Betty Crocker gets 48 servings from this. We maybe got 10! I guess if I want 40 servings I'll have to cut squares rather than break into pieces.

*I just used a 13x9 baking pan.

*The next candy I make will be.... Easy Candy-Bar Treats. Can't Wait!

7.20.2007

Pop It

On Wednesdays I take yoga at 6:30. The minor problem with this is I get off work at 4:00 so that is a pretty big gap from the time I get home to the time I leave for the gym. Instead of plopping my ass on the floor and surfin the net like I usually do, I decided to peruse one of my cook books. I was paying close attention to the "Candies" section when I came across this recipe. I had all the ingredients so I thought, why not. M loved it!

Caramel Corn


Prep: 10 min Cook: 10 min Bake: 20 min Oven: 300 Makes: 7 or 8 cups
7 to 8 cups of popped popcorn (1 bag)
3/4 cup packed brown sugar
6 tablespoons of butter
3 tablespoons of light-colored corn syrup
1/4 teaspoon baking soda
1/4 teaspoon vanilla

1) Remove all unpopped kernels from popped popcorn. Put popcorn into a baking or roasting pan. Keep popcorn warm in a 300 degree oven while making caramel mixture.

2) For caramel mixture, in a medium saucepan combine brown sugar, butter, and corn syrup. Cook and stir over medium heat until mixture boils. Continue boiling at a moderate, steady rate, without stirring, for 5 minutes more.

3) Remove saucepan from heat. Stir in baking soda and vanilla. Pour caramel mixture over popcorn; stir gently to coat. Bake in a 300 degree oven for 15 minutes. Sir mixture; bake 5 minutes more. Spread caramel corn on a large piece of buttered foil to cool. Store tightly covered for 1 week.