Showing posts with label Cookie Carnival. Show all posts

5.31.2009

Cookie Carnival: Almond Macaroon Sandwiches


I'm barely getting this posted in time! I forgot all about the recipe until today and decided to throw it together. I didn't want to be like last month when I missed it and posted late.

This month Kate chose Hazelnut Macaroon Sandwiches. I was nervous about making these because 1) I'd never made Macaroons before and 2) I don't get along so well with sandwich cookies. Luckily, the recipe was pretty simple.

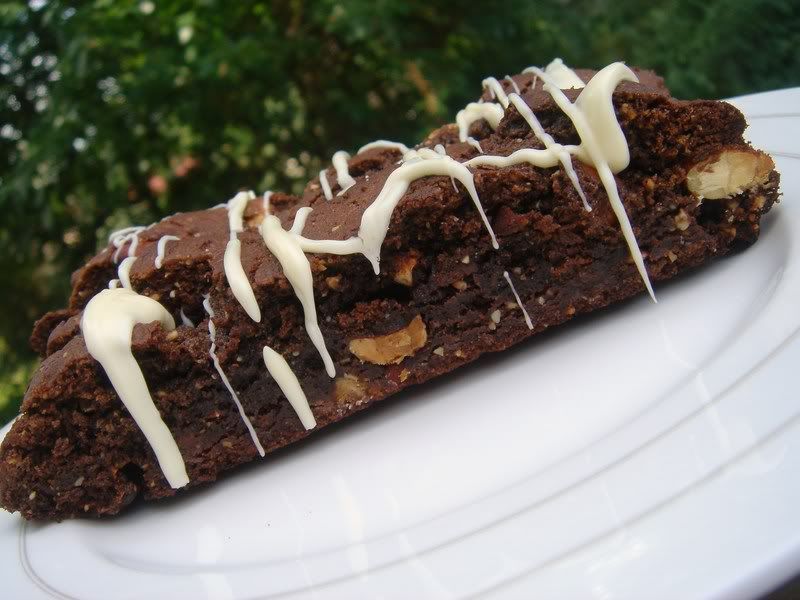
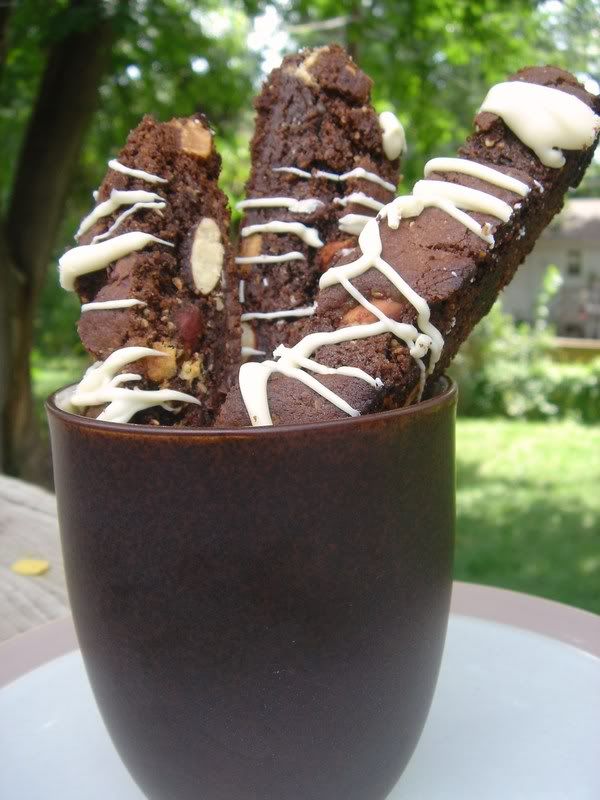
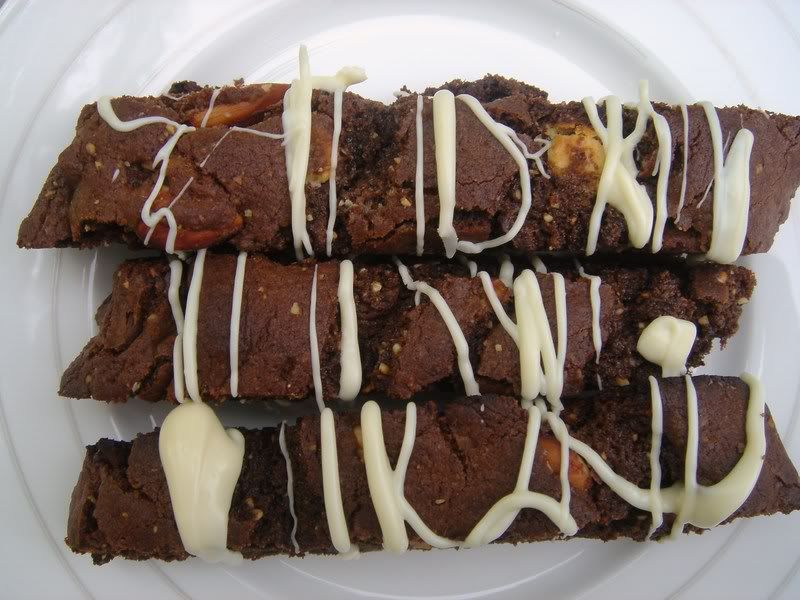
Everything was going well while I prepared this until I went to pipe the mixture on the parchment paper. I sort of missed the part where it says pipe MOUNDS. I guess I saw the word diameter and just assumed I was supposed to pipe circles. Well that certainly didn't work for me and I was annoyed so I decided to just take a measuring cup and pour the mixture on the baking sheet. So it really doesn't look like I have macaroons, I have flat circles. But they are still so good! I substituted ground almonds for the hazelnuts and it tastes great . The cookie itself is delicious, it's light and sweet with a hint of almonds. Add the chocolate ganache filling and it's just amazing. I'm looking forward to trying to make this again... the right way!

Almond Wanna-Be Macaroon Sandwiches
Source: Williams-Sonoma

INGREDIENTS:
* 4 egg whites, at room temperature
* 1/4 tsp. cream of tartar
* 1/4 cup superfine sugar
* 1 tsp. vanilla extract
* 1 cup toasted, skinned and ground almonds
* 2 cups confectioners’ sugar, sifted
* About 2/3 cup ganache filling (see below) refrigerated until cool and thick enough to spread

DIRECTIONS:

Line 2 rimless baking sheets with parchment paper. Have ready a third rimless baking sheet, unlined.

In the bowl of an electric mixer fitted with the whisk attachment, combine the egg whites and cream of tartar and beat on medium speed until the whites begin to thicken. Increase the speed to medium-high and beat just until soft peaks form. Slowly add the superfine sugar and continue to beat until stiff, shiny peaks form. Beat in the vanilla until blended. Using a rubber spatula, fold in the almonds and confectioners sugar until incorporated.

Scoop the mixture into a pastry bag fitted with a 1/2-inch plain tip. Pipe mounds 1 1/2 inches in diameter onto the prepared baking sheets, spacing the mounds 1 inch apart. With a damp fingertip, gently smooth any pointy tips. Let the cookies stand, uncovered, at room temperature for 35 to 45 minutes.

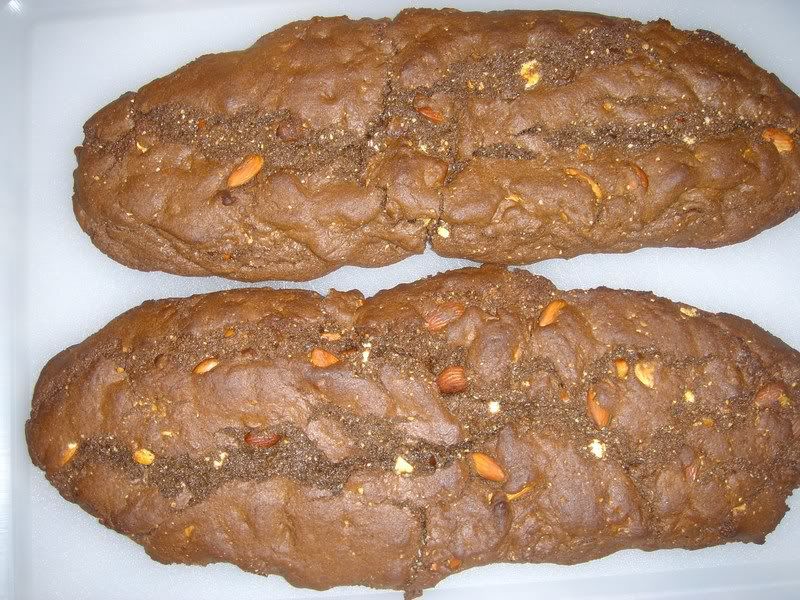
Preheat an oven to 350°F.Bake the cookies, 1 sheet at a time, putting the cookie-filled baking sheet on top of the unlined baking sheet. (This insulates the top bak­ing sheet so the cookie bottoms do not darken too much.) Bake until the tops and bottoms are firm and golden, 10 to 13 minutes. That wasn't quite enough for me (as you can see they look a bit light, not so golden.)

Remove the baking sheet from the oven, carefully lift the parchment, one end at a time, and sprinkle about 2 Tbs. water under the paper. Be careful that the steam does not burn you and that water does not splash on the cookies. (The steam loosens the cookies from the paper.) After 3 minutes, slide the parchment paper off the baking sheet, peel the cookies from the paper and transfer them to wire racks to cool completely.

Turn half of the cookies bottom side up. Spread a thin layer of the ganache filling (about 1 rounded tsp.) over the cookie bottoms. I piped my filling in because the cookies were huge! Press a plain cookie, bottom side down, onto the ganache. Store the cookies in an airtight container at room temperature for up to 3 days.
Makes about 24 cookies.

Chocolate Ganache Filling

INGREDIENTS:
* 2 Tbs. unsalted butter
* 1/2 cup heavy cream
* 6 oz. bittersweet or semisweet chocolate, finely chopped

DIRECTIONS:

In a heatproof bowl, combine the chocolate and butter.

In a small saucepan over medium-high heat, bring the cream just to a boil. Remove from the heat and immediately pour the cream over the chocolate and butter. Using a handheld whisk, stir the mixture until the chocolate and butter melt and are smooth. Let cool until spreadable.

Makes about 1 1/3 cups.

Thanks Kate for another great month!

5.17.2009

Belated Cookie Carnival: Toasted Almond Pink Lemonade Bars

I missed Cookie Carnival last month and was really bummed out. I was so looking forward to making lemon bars. I don’t like lemon bars but really wanted to mess around with the recipe a bit. Even though I missed the carnival I decided to play along when I had time. Rather than just making “plain” lemon bars I made Pink Lemonade Bars using Strawberry and Lemon.

The bars were tart yet very sweet, just like Strawberry Lemonade and the almond shortbread gave a nice crunch to the bars. I took these took work and got as many compliments on the yummy shortbread crust as I did the bars as a whole. They have definitely beat out my old favorite Strawberry Bar recipe. They are a bit labor intensive but well worth it. Kate and Holly, I'm so bummed out I missed this month. These were absolutely wonderful. I just bought 4lbs of Strawberries and I know where some of them will be going…

Toasted Almond Pink Lemonade Bars
Adapted From The Sweet Melissa Baking Book by Melissa Murphy
Makes 1 dozen bars


For the Crust:
2 cups all-purpose flour
3/4 cup confectioners' sugar
1/2 cup sliced blanched almonds, lightly toasted
1/2 teaspoon salt
20 Tablespoons (2 1/2 sticks) cold, unsalted butter, cut into 1/4-inch pieces

For the Stawberry Lemon Filling:
4 large eggs
1 3/4 cups sugar
1/2 teaspoon almond extract
1/2 cup all-purpose flour
3/4 cup fresh lemon juice (about 3-4 lemons)
1 cup strawberries, hulled and pureed 1/4 cup confectioners' sugar for sprinkling

To Toast the Almonds:
Preheat the oven to 350 degrees F. Spread the almonds in a single layer on a cookie sheet. Bake for 10 to 12 minutes, or until lightly golden and you can smell them. Remove to a wire rack to cool.

Before You Start:
Position a rack in the center of your oven. Preheat the oven to 350 degrees F. Spray a 9 x 13 - inch pan with nonstick vegetable cooking spray. Make a parchment "sling" by cutting two pieces of parchment paper, measuring 16 1/2 inches long by 12 inches wide (you can also use aluminum foil). Place one piece across the length, and the other across the width of the pan, with the excess hanging over the edges. You will use this sling later to lift the finished bar from the pan. Spray the sling with the cooking spray.


To Make the Crust:
1. In the bowl of a food processor fitted with the metal blade, pulse the flour, sugar, almonds, and salt to combine. Add the cold butter in pieces and pulse until the dough comes together in a ball. This was my first time making dough in my food processor and it was so easy. It turned out sooo much better than using my blender.

2. Turn the dough out into the prepared pan and press evenly into the bottom and 1 1/4 inches up the sides. (This crust, once it is baked, needs to act as a liner in which to pour the liquidy lemon filling. So be sure to do a good job of pressing the dough up the sides - no cracks!). Cover the dough with a piece of parchment paper or aluminum foil, and fill with pie weights ( you can use dried beans or uncooked rice as pie weights as well). Bake for 25 to 30 minutes, or until lightly golden. Carefully remove the pie weights and the liner and bake for an additional 10 to 15 minutes, or until the whole crust is golden. Remove to a wire rack to cool.

To Make the Filling:
In a medium bowl, whisk together the eggs and sugar until smooth. Add the almond extract and flour, and whisk until smooth. Add the lemon juice and strawberry puree, and whisk to combine.

To Complete the Bars:
1. Pour the lemon strawberry filling into the prepared crust. Reduce the oven temperature to 325 degrees F. Bake for 30 minutes, or until the filling is firm and lightly golden. Remove to a wire rack to cool.

2. When cool use the parchment sling to lift the entire bar from the pan and onto a cutting board. Slice into twelve 3 x 3 1/2 - inch bars. Remove from the pan and, using a small sifter, dust with the confectioners' sugar.

The bars keep in an airtight container at room temperature for up to 2 days. For longer storage, wrap in plastic wrap and refrigerate for up to 5 days, or freeze well wrapped in plastic wrap and then aluminum foil for up to 3 weeks. Do not unwrap before defrosting. Dust with confectioners' sugar before serving.


To check out the results of April’s Cookie Carnival, go visit Holly of Phemomenon who was the guest host this month. For more information on Cookie Carnival go check out Kate at the Clean Plate Club.

2.25.2009

Cookie Carnival: Fudge Cookies with Toffee and Dried Cherries

Well, maybe not quite. But, Cookie Carnival is Back!

CC was on a break in January and I just didn't have time to participate in December. I'm so glad it's back. This month Kate chose Fudge Cookies with Toffee and Dried Cherries from Regan Daley. I was happy to see we were baking chocolate cookies this month, but cringed when I saw the dried cherries. I don't like cherries. I planned on just leaving them out when I decided to take the cookies a whole different route.... Chocolate and Orange.

Have you ever had a bite of an orange and then popped a piece of dark or bittersweet chocolate in your mouth? Heaven. It's a simple combination that tastes (almost) luxurious. It's a wonderful way to indulge. I've been on an orange kick the past couple weeks. I like to pair it with dark Hershey kisses from time to time. With all the chocolate in this recipe I knew adding orange would be a sure winner. I've also developed an obsession with lime recently and at the very last minute decided to add lime zest and lime juice to the recipe as well.
The result was a fresh, citrus-y flavored cookie. The orange and lime didn't overpower the chocolate, but they really complimented it. Matt liked these, I absolutely loved them. I was going to give them to Matt to take the work, but decided my freezer would make a much better home. Next time we have Mexican and some Corona I think these cookies will make a great addition :)

Fudgy Orange Cookies
(orange fudge cookies? chocolate chunk orange cookies?)
INGREDIENTS
2 1/4 cups all-purpose flour
1/2 cup unsweetened dutch-process cocoa powder
1 teaspoon baking soda
1/4 teaspoon salt
1 cup unsalted butter, room temperature
1 cup tightly packed dark brown sugar
3/4 + 1tbsp granulated sugar, separated
2 large eggs
1 cup dark chocolate chips
Zest and Juice (mine was about 1/4 cup) of 1 orange
Zest and Juice of 1 lime

INSTRUCTIONS

Preheat the oven to 350 degrees. line two heavy baking sheets, not non-stick, with parchment paper and set aside. sift the flour, cocoa, baking soda and salt together into a bowl and set aside. In a small bowl mix orange and lime zest with 1tbsp of sugar.
In a large mixing bowl or the bowl of an electric or stand mixer fitted with the paddle attachment, cream together the butter and both sugars until light in colour and fluffy, about 2 minutes. add the eggs, one at a time, beating well after each addition and scraping down the sides of the bowl. beat in the orange and lime juice. stir in the flour-mixture in 3 additions, blending just until the dry ingredients are moistened. Stir in the chunky ingredients and mix until they seem evenly distributed.
Drop the batter by heaping tablespoons onto the prepared baking sheets and place them in the center of the oven. bake the cookies for 15-18 minutes, or until barely set in the center and just firm around the edges. I have no clue how long mine baked, I just watched them until they looked almost done, but still sort of gooey. cool the cookies on the tray for 5-10 minutes, then transfer to wire rack to cool completely before storing.


So Kate, thank you so much for choosing this recipe. I know I wondered pretty far off the reservation with this one, but I definitely used the guidance of the original recipe. To check out the original recipe, please go visit Kate at The Clean Plate Club!

11.25.2008

Cookie Carnival: Ultimate Chewy and Soft Chocolate Chunk Cookies

It's Cookie Carnival time again!


This month the fabulous Kate chose The Ultimate Chewy and Soft Chocolate Chunk Cookies. I was happy to see a "normal" recipe that wouldn't take a lot of time to bake. I was skeptical these were really going to be the Ultimate Chocolate Chip Cookie, you see my heart belongs to ATK's Thick and Chewy Chocolate Chip Cookie.

2 weeks ago I decided to do something crazy.... I gave up sweets. I'm not one of those people that can have a little bit and my craving is satisfied, if I taste a little bit of something, I need more. I did this a few years ago during Lent and it really wasn't that bad. I let myself cheat on Sundays and usually by Sunday, I'm so used to not eating sweets I don't go overboard on what I do have.

So I whipped these up 2 Sundays ago and fell in love with the dough. It was SOOOO good, I was super excited to try the cookies. When I did try them, I was somewhat disappointed, they weren't nearly as good as I had hoped. The next morning I took my pictures and it was so hard not to pop these in my mouth - especially because baked goods always seem to taste better the next day. I was good though and stuck them in the freezer. So skip forward to last Sunday I had two of them during the day and realized that these are pretty damn good. I'm not sure if they'll take the place of my Thick and Chewys, but I will definitely make these again.

I didn't mess with the recipe much, but I did experiment with a second batch and made a thick blondie type thing. I made the dough and put it in an 8x8 baking dish and popped them in the oven. I started the oven out at 325 and then gradually increased it up to 375. They turned out very good, but I was worried about the center setting and I baked them a little longer than I should have. (I have no idea what my baking time way, I just kept checking them in the oven.)The bars would be amzing while still warm with a scoop of vanilla ice cream on top!


The Ultimate Chewy and Soft Chocolate Chunk Cookies (and Bars)
Source: In The Sweet Kitchen by Regan Daley


INGREDIENTS
1 cup unsalted butter at room temp
1 cup tightly packed light brown sugar
1/2 cup granulated sugar
2 large eggs
1 1/2 tsps. pure vanilla extract
3 cups plus 2 tbsp. all-purpose flour
1 tsp. baking soda
1/2 tsp. salt
16 oz. flavorful bitter or semi-sweet chocolate, coarsely chopped ( I used 8oz bitter and 8oz semi)


INSTRUCTIONS
1. Preheat oven to 350 F. Line two baking sheets with parchment paper, or lightly butter them, and set aside. In the bowl of an electric mixer, or stand mixer fitted with paddle attachment, or a large bowl if mixing by hand, cream the butter and sugars until light and fluffy. Add the eggs, one at a time, beating well and scraping down the sides of the bowl after each addition. Beat in the vanilla.

2. Sift the flour, baking soda and salt together in a small bowl. Add the dry ingredients to the butter-sugar mixture, and mix until just combined. Fold in the chocolate chunks.

3. Using your hands, shape knobs of dough about the size of a large walnut and place them 2 inches apart on the baking sheets. Stagger the rows of cookies to ensure even baking. Bake 12-15 for smaller cookies, 14-17 for larger ones or until the tops are a light golden brown. If the cookies are neither firm nor dark when they are removed from the oven, they will cool chewy and soft. Cool the cookies on the sheets for 5 minutes, then transfer to wire racks to cool completely. If somehow they don't get inhaled immediately, they may be stored airtight at room temperature for up to one week.


10.19.2008

Cookie Carnival: Mini Pumpkin Whoopie Pies


It's Cookie Carnival Time again! This month we baked Mini Pumpkin Whoopie Pies. I was very excited - chocolate and pumpkin, one of my favorite combinations. I had a much easier time this month than I did last month. The actual cookie part is soft and cake-like. It has a mild chocolate flavor and is pretty unremarkable on it's own. It almost reminds me of devils food cake. Pair it with the tasty pumpkin filling and you have yourself a nice treat.

I messed around with the recipe a bit adding 3/4 cup of chocolate chips to the dough and making some changes to the filling. Thanks to the success I had last time I baked a chocolate/pumpkin treat, I decided to add melted Pumpkin Spice Kisses (25 or so). I also used some pumpkin pie spice and decided that the filling wasn't pumpkiney enough. Rather than the 1/4 cup of pumpkin the recipe calls for I ended up using an entire can. I think this changed the consistency and appearance of the filling, but it is so good.

Matt and I both enjoyed these cookies. If I were to make them again I would add the melted kisses to the cookie dough to spice it up a bit and increase the chocolate chips to 1 cup.

Thanks Kate for choosing this recipe!


Mini Pumpkin Whoopie Pies
Source: Martha Stewart


FOR THE COOKIES:
My adaptions in italics

1 3/4 cups all-purpose flour
3/4 cup unsweetened cocoa powder (not Dutch-process)
1 1/2 teaspoons baking soda
1/2 teaspoon coarse salt
1 tablespoon unsalted butter, softened
1/4 cup vegetable shortening
1/2 cup granulated sugar
1/2 cup packed dark-brown sugar
1 large egg
1 cup whole milk
1 teaspoon pure vanilla extract
3/4 cup milk chocolate chips

FOR THE FILLING:
4 ounces cream cheese, at room temperature
1/2 cup (1 stick) unsalted butter, at room temperature
1/2 cup confectioners' sugar
1/4 cup canned solid pack pumpkin I used an entire can
Pinch of cinnamon
Pinch of nutmeg
Pumpkin Pie Spice
25 Hershey's Pumpkin Spice Kisses - melted


DIRECTIONS:

Prepare cookies: Preheat oven to 375 degrees. Sift together flour, cocoa powder, baking soda, and salt into a medium bowl; set aside.

Place butter, shortening, and sugars into the bowl of an electric mixer fitted with the paddle attachment. Mix on high speed until smooth, about 3 minutes. (mine never actually got smooth, just a moist crumbly texture, too much sugar to get smooth) Add egg; mix until pale and fluffy, about 2 minutes. Mix in half the flour mixture, then the milk and vanilla. Mix in remaining flour mixture.

Drop about 2 teaspoons dough onto baking sheets lined with parchment paper, spacing 2 inches apart. Bake until cookies spring back when lightly touched, 12 to 14 minutes. Transfer baking sheets to wire racks and let cool 10 minutes. Remove cookies from baking sheets and transfer to wire racks using a spatula; let cool completely.

Prepare filling: In the bowl of a mixer fitted with the paddle attachment, whip together cream cheese, butter and confectioners' sugar on medium speed until smooth, about 3 minutes. Add pumpkin, cinnamon, and nutmeg; whip until smooth, scraping down the bowl as necessary.

Pipe or spoon about 2 teaspoons filling on the flat sides of half the cookies. Sandwich with remaining cookies, keeping the flat sides down.


Makes about 20 cookies

9.25.2008

Cookie Carnival: Pink Grapefruit Sandwich Cookies


Grapefruit Sandwich Cookies: 1
Stacey: 0

Where do I even begin????? As Julie Andrews sang in The Sound of Music…. Let’s start from the beginning, a very good place to start...
This month for Cookie Carnival, Kate of The Clean Plate Club took suggestions from those of us participating. The recipe Kate chose was a Martha recipe, Pink Grapefruit Sandwich Cookies. It was submitted by Mari of Mevrouw Cupcake. I’ll be honest my first two thoughts when I saw the recipe were:

1) Sandwich cookies.... pain in the ass
2) Grapefruit… ewwwww.

I tossed around the idea of subbing oranges in for the grapefruit, but I wasn’t sure how many oranges I would need to substitute. So I just stayed with the grapefruit. On Sunday I went to the store realized I had to be honest with myself. I have never even tried grapefruit before. How did I know I really didn’t like it? Then I had another realization, I didn’t really know what a whole grapefruit looks like. Luckily I found them and bonus… they were on sale!

So fast forward (or I guess at this point rewind =) ) to Tuesday. I had a rough day, just one of those days I didn’t really feel good and was so exhausted all I wanted to do was go home and sleep. But, if I wanted to get my recipe baked and submit it on time I had to do it Tuesday night. So I sucked it up and made the cookies.

As soon as I started the cookies I was annoyed. I realized I was out of cake flour, so I had to find a substitute. Then I moved onto the zesting/grating portion of the recipe and grew even more annoyed. I just find it to be such a pain in the butt. After that, I squeezed the damned grapefruit by hand in order to get the juice. At that point I was wondering why I decided to make the recipe. I soldiered on though and made the dough. I tried a bit of it and, OH MY GOSH! I loved it. Tasted just like orange sherbet!

So from there I put my dough in the fridge, searched through a drawer in my kitchen, and found super cute heart cookie cutters to use. Fast forward 45 minutes and I took the dough out and rather than flouring the surface of my counter, I was going to roll it between wax paper. There is where my REAL problems began. I rolled it out and peeled back my top sheet of wax paper. The dough was sticky and gooey, not like other roll out cookies I have made in the past. There was no way I could use a cookie cutter on those. So I scraped up my sticky/gooey mess and threw it in a small bowl and stuck it in the freezer thinking I would just forget rolling and make drop cookies.

I kept the dough in the freezer for about 20 minutes before I threw my first dozen in the oven. I peeked in on them and they just didn’t look right. So with that I was certain the cookies had defeated me. I went to lay on the couch and was going to drown my sorrows in 90210 when it hit me that maybe I didn’t add enough flour. Sure enough, I re-read the recipe and forgot a ½ cup of AP flour. With that, I added about 1/3 cup of flour to the remaining dough and wow, what a difference that made.
(cookies on the left with additional flour, on the right without)

So I baked all of these as drop cookies, let them cool and luckily made my icing without a hitch. I did decide to pipe the icing rather than use a spatula.
Overall though, I actually liked these cookies. They had a nice citrus taste. I think they would be a good baby shower or wedding shower cookie. Matt didn’t have very high hopes for these either and said he was “impressed”. I brought some into my coworkers and they really liked them as well.

I’m upset they didn’t turn out like they should have. I think I will try to make these again, with the cake flour, with the right amount of AP flour and my heart cookie cutters. Thanks Kate for choosing this recipe. You got me out of my comfort zone and one step closer to grapefruit. :)

Pink Grapefruit Sandwich Cookies
You can bake the cookies and make the filling the day ahead.
Source: Martha Stewart


Grated zest of 1 Ruby Red grapefruit, plus 1/4 cup freshly squeezed juice
1 cup sugar
1 1/2 cups all-purpose flour, plus more for work surface
3/4 cup cake flour (not self-rising)
1 teaspoon baking powder
1/2 teaspoon salt
1/2 cup (1 stick) unsalted butter, softened
2 large egg yolks
Pink Grapefruit Filling

Preheat oven to 350 degrees. Line a baking sheet with parchment paper; set aside. In a small bowl, combine zest with 1 tablespoon sugar; set aside. In a medium bowl, whisk together both flours, baking powder, and salt; set aside.

In the bowl of an electric mixer fitted with the paddle attachment, beat butter and remaining sugar on medium-high speed until light and fluffy, about 2 minutes, scraping down sides of bowl as needed. Add egg yolks, and beat until combined, scraping down sides of bowl as needed. Beat in reserved zest-sugar mixture. Add flour mixture in two batches, alternating with the juice, and beat to combine.

Turn out dough onto a piece of plastic wrap, and shape into a 1-inch-thick disk. Wrap in plastic, and refrigerate until firm, about 30 minutes

On a lightly floured work surface, roll out disk to 1/8 inch thick using a lightly floured rolling pin. Using a lightly floured 2-inch round cookie cutter, cut out rounds and place about 1 inch apart on prepared sheet. Bake, rotating sheet halfway through, until edges are golden, 18 to 20 minutes. Transfer sheet to a wire rack to cool 5 minutes. Transfer parchment paper and cookies to rack to cool completely

Using an offset spatula, spread 1 tablespoon filling onto flat sides of half the cookies. Sandwich with remaining cookies, keeping flat sides down. Once filled, cookies can be kept in an airtight container in the refrigerator for up to 3 days.

Pink Grapefruit Filling
1/2 cup unsalted butter, softened
2 cups confectioners’ sugar
1 tablespoon honey
3 tablespoons freshly squeezed Ruby Red grapefruit juice

In the bowl of an electric mixer fitted with the paddle attachment, beat butter and sugar until light and fluffy, about 4 minutes. Beat in honey. Add juice, 1 tablespoon at a time, until filling holds together and is smooth and creamy, about 2 minutes. Transfer to a small bowl, cover, and set aside until ready to use

8.24.2008

Cookie Carnival: Chocolate Hazelnut Biscotti


When I think of biscottis, I think of high school when I worked at the St. Louis Bread Co. There was a lady with a very strong English accent that would come in all the time asking for a biscotti. To this day I can’t say the word without an English accent. I’ve never really cared for biscottis, too dry for my liking. When Kate announced that the recipe for Cookie Carnival this month was for a biscotti I realized I didn’t actually know what a biscotti was. I soon found out biscotti means twice baked. With that knowledge under my belt, I decided to give this recipe a whirl.

I made a few changes, I don’t care much for hazelnuts so I substituted almonds and added white chocolate chips and melted white chocolate on top. I also added more vanilla extract and cut back on the almond extract. The results were better than I expected. Not as dry as I thought they would be, but I wish I would have cut the amount of whole almonds in half and added more white chocolate chips. All in all though, a pretty darn good treat. I might just have to take up drinking coffee to have with my treat.

Thanks Kate for choosing a recipe to broaden my baking horizons!

**** So I have to update this. After munching on them all week, I have come to the conclusion that these are absolutely delicious. Even my husband loves them and it's not something he would usually like. I will most definitely be making these again, maybe next time though I will cut the recipe in half.****

Chocolate Almond Biscotti
Adapted from: Bon Appétit from The Bakehouse, Bloomington, IN


Ingredients - my adaptations in italics

1 1/2 cups almonds, toasted
3 cups all purpose flour
2/3 cup unsweetened cocoa powder
1 teaspoon baking soda
1 teaspoon baking powder
1/2 teaspoon salt
1 cup (2 sticks) unsalted butter, room temperature
2 cups sugar
3 large eggs
2 teaspoons vanilla extract
1/4 teaspoon almond extract
1 cup semisweet chocolate chips
1/4 cup white chocolate chips

For Drizzle:
1/4 cup white chocolate chips
1/4 tsp shortening


Preparation

Preheat oven to 350°F. Line heavy large baking sheet with parchment paper. Grind 1/2 cup toasted hazelnuts in processor. Set aside. Whisk flour, cocoa, baking soda, baking powder and salt in large bowl. Beat butter and sugar in another large bowl to blend. Add eggs and vanilla and almond extracts and beat until well blended. Beat in flour mixture. Mix in 1 cup whole toasted hazelnuts, chocolate chips and 1/2 cup ground hazelnuts

Divide dough into 2 equal pieces. Shape each piece on baking sheet into 2 1/2-inch-wide by 14-inch-long log. Place logs on prepared baking sheet, spacing 2 1/2 inches apart (logs will spread during baking). Bake until logs feel firm when tops are gently pressed, about 35 minutes. Cool logs on baking sheet 15 minutes. Maintain oven temperature.


Using long wide spatula, transfer baked logs to cutting board. Using serrated knife, cut warm logs crosswise into 1/2-inch-thick slices.

Arrange slices, cut side down, on 2 baking sheets. Bake biscotti until firm, about 15 minutes. Transfer to racks and cool completely.

Drizzle: Place 1/4 Cup White Chocolate Chips and 1/4 teaspoon shortening (do not use butter, margarine, spread or oil) in small microwave-safe bowl. Microwave at medium 30 seconds; stir. If necessary, microwave at medium an additional 10 seconds at a time, stirring after each heating, until chips are melted and mixture is smooth. Pour melted mixture into plastic sandwich bag. Snip corner off of bag and pipe mixture over biscotti.


Biscotti can be prepared ahead. Store in airtight container up to 4 days, or wrap in foil and freeze in resealable plastic bags up to 3 weeks.)

7.27.2008

Cookie Carnival: Blackberry Almond Bars


I'll be honest, when I got the email stating the recipe for July was Blackberry Almond Bars, I wasn't exactly thrilled. Hot Fruit? Blackberries? What's a chinois set? Will my blender work in place of a food processor? (A Food Processor is on my Christmas List for this year.) Even though I wasn't too keen on the recipe, I still wanted to participate. I mean part of the reason I joined this event was to try new things. A girl can only bake so many chocolate and peanut butter goodies.

Ever since I tried Katie's fabulous Juicy Strawberry Scones, hot fruit doesn't gross me out like it used to or I would have totally passed on this. I don't like Blackberries (actually the only berry I like is a Strawberry), so I decided to mess around with the recipe a bit. I was kind of concerned the strawberry and almond flavors wouldn't go together, but the taste blends quite well.

I'm really glad I decided to participate because when I tried one, my first thought was HOLY CRAP! These actually turned out! They are EXCELLENT! I can't wait to make them for a group of people sometime. These are certain to be a crowd-pleaser.

Strawberry Almond Bars
Adapted from: Williams-Sonoma


INGREDIENTS:

For the shortbread:
* 12 Tbs. (1 1/2 sticks) chilled unsalted butter, cut into 1-inch pieces
* 2 cups all-purpose flour
* 1/2 cup ground toasted almonds
* 1/2 cup granulated sugar
* 1/2 tsp. salt

For the strawberry curd:
* 1 lb strawberries
* 4 eggs
* 1 1/2 cups granulated sugar
* Pinch of salt
* 1 Tbs. fresh lemon juice
* 4 Tbs. (1/2 stick) unsalted butter, at room
temperature, cut into 1-inch pieces

Confectioners’ sugar for dusting


DIRECTIONS:
Preheat an oven to 350°F. Lightly butter a 9-by-13-by-2-inch cake pan.

To make the shortbread, in the bowl of a food processor, (used my blender) combine the butter, flour, almonds, granulated sugar and salt and process until small lumps form. Sprinkle the mixture into the prepared pan and press evenly into the bottom. Bake until the shortbread is golden, about 20 minutes. Transfer the pan to a wire rack. Reduce the oven temperature to 325°F.

Meanwhile, make the strawberry curd: In a food processor or blender, puree the strawberries until smooth. Pass the puree through a chinois set over a bowl, using a pestle to press on the solids and extract as much juice as possible; discard the solids. You should have about 3/4 cup juice. I skipped the whole chinois part of the step and just used the pureed strawberries, I ended up with about 1 and 1/4 cup.

In the top pan of a double boiler or in a nonreactive saucepan, whisk together the eggs and granulated sugar until blended. Then whisk in the strawberry puree, (I used about 1 cup) salt and lemon juice. Set the top pan over but not touching simmering water in the bottom pan, or set the saucepan over medium-low heat. (If using a saucepan, take care not to heat the mixture too quickly.) Cook, stirring constantly with a wooden spatula or spoon, until the mixture is warmed through, 1 to 2 minutes.

Begin adding the butter a little at a time, stirring each addition until blended before adding more. Continue cooking, stirring constantly and scraping the bottom of the pan, until a finger drawn across the back of the spatula leaves a path, 8 to 10 minutes more. Immediately remove the pan from the heat. Pass the curd through the chinois set over a bowl and let stand for 10 minutes. (again, skipped the chinios and just let the mixture stand) Whisk to blend, then pour the curd over the shortbread, spreading it evenly to the edges.

Bake until the curd is set, about 30 minutes. Transfer the pan to a wire rack and let cool completely. Cut into individual bars, cover and refrigerate until ready to serve. Dust the bars with confectioners’ sugar before serving.
Makes 20 bars.


Thank you Kate for choosing this recipe. I love it. Be sure to check out Cookie Carnival to see the original recipe and entries from other bloggers!

6.23.2008

Cookie Carnival: Snickerdoodles

I was so excited this weekend when I found out there was a blog event for cookies: Cookie Carnival hosted by Kate of The Clean Plate Club. Cookies are my favorite thing to bake and most definitely one of my favorite desserts. It's about time cookies get a little recognition!


This month the recipe is Snickerdoodles from good ole' Martha Stewart. Now, I've never made Snickerdoodles from scratch before because.... shortening grosses me out big time. I have no problem eating a cookie made with shortening, but actually scooping the stuff out of a container and into a measuring cup... nasty! Last month I purchased shortening to make my MIL's Coconut Coookies, but I just couldn't bring myself to use it, so I used butter instead (and I wonder why they didn't turn out as good as hers.) I have no issues using 2 sticks of butter in a recipe or 4 cups of sugar, but for some reason shortening just skeeves me out.

Last week when I made Triple Threat Blondies, I made a small step toward overcoming my fear of shortening and used a 1/4 tsp in the topping. :0) Well this week I grew by leaps and bounds and used a 1/2 cup. The good news is, I wasn't tempted to eat the batter! I followed the recipe almost exactly. I used a little more cinnamon than called for and didn't follow the baking directions exactly. (see the red italics below)

Overall these cookies were fab... shortening and all!

Snickerdoodles
Martha Stewart
Makes: 4 Dozen


Ingredients

* 2 3/4 cups all-purpose flour
* 2 teaspoons cream of tartar
* 1 teaspoon baking soda
* 1/4 teaspoon salt
* 8 tablespoons (1 stick) unsalted butter
* 1/2 cup pure vegetable shortening
* 1 3/4 cups sugar, plus more if needed
* 2 tablespoons ground cinnamon, plus more if needed
* 2 large eggs

Directions

1. Preheat the oven to 400 degrees, with one rack in top third and one rack in bottom third of oven. Line baking sheets with Silpat baking mats or parchment paper; set aside.

2. Sift together flour, cream of tartar, baking soda, and salt; set aside. In the bowl of an electric mixer fitted with a paddle attachment, combine butter, shortening, and 1 1/2 cups sugar. Beat on medium speed until light and fluffy, about 2 minutes. Scrape down sides of bowl. Add eggs, and beat to combine. Add dry ingredients, and beat to combine.

3. In a small bowl, combine remaining 1/4 cup sugar and the ground cinnamon. Use a small (1 1/4-ounce) ice-cream scoop to form balls of the dough, and roll in cinnamon sugar. Place about 2 inches apart on the prepared baking sheets. Bake until the cookies are set in center and begin to crack (they will not brown), about 10 minutes, rotating the baking sheets after 5 minutes. Transfer the sheets to a wire rack to cool about 5 minutes before transferring the cookies to the rack. (Any time I try the rotating baking sheets method, my cookies always end up burnt. My 30 year old oven sucks and will burn anything that is lower the second rack in the oven. I just baked these one sheet at a time on the top rack. My baking time was only about 6 min)

Store in an airtight container up to 1 week.